 With the spread of smartphones, the use of social media has also increased, and people worldwide are sharing various videos and images daily.
This trend applies to music as well, with not only professional performers but also amateurs sharing their performances on platforms like YouTube. I personally find it helpful to have so many performance videos available, as they offer a lot of valuable insights.
I’m not sure if others will agree, but I have a small complaint about the way performances and concerts are shown on television.
Could you hear me out for a moment?
What bothers me is how the camera tends to focus excessively on the performer’s face. Do we really need so much face time?
We already know who’s playing, and the face itself isn’t directly related to the performance. I think it’s unnecessary to show it so often. Instead, I’d rather see more of the arms and elbows in action, or even the pedaling technique. I want the focus to be more on the performance itself.
Some recordings show only the fingers, but I’d like to see not just the fingers but also the wrists, elbows, and arms!
It’s disappointing when a great shot suddenly cuts to a close-up of the performer’s face. No! That’s not what I want to see…
In the case of male performers wearing jackets, the movement of their arms is often hard to discern, but if the camera focuses on them, we can still catch those details. (There was an episode of the show “題名のない音楽会” [“Untitled Concert”] that focused on the muscles of the performers, and I personally found it fascinating.)
In this respect, I think YouTube videos are excellent.
YouTube videos usually don’t switch angles as frequently as television does, and they offer unique perspectives, like side angles or top-down views, which allow you to clearly see the movement of the arms, elbows, and hands.
In the past, I rarely used YouTube videos for reference, only listening to get a sense of what a piece sounded like when accompanying it. But now, with so many performance and instructional videos available, I find them very helpful.
YouTube videos are also convenient because you can easily watch them on your smartphone anywhere and replay the parts you’re curious about as many times as you want!
I started with a complaint, but this time I’d like to talk about glissando.
Glissando frequently appears in classical music pieces, but I’ve noticed that pianists who are gaining popularity on YouTube often add their own arrangements to their performances and seem to use glissando quite extensively.
Using glissando adds an instant touch of brilliance to a piece, making it one of the most effective techniques for enhancing a performance.
This time, I want to focus on glissando, a technique that’s being widely used by today’s trending pianists.
■ 目次
Single-Note Glissando Isn’t That Difficult
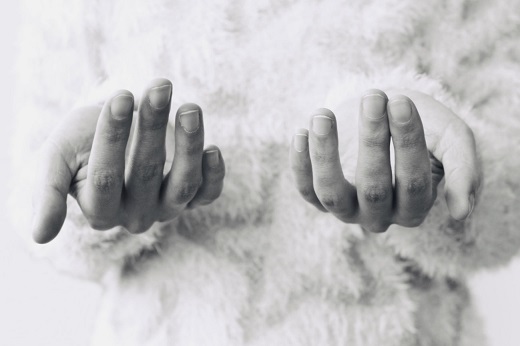 I’m sure most of you already know what glissando is, but to explain it again, it’s a technique where you rapidly slide your fingers or nails across the keys (on a piano).
The term originates from the French word “glisser” (to slide), and the word we use, “glissando,” is its Italianized form.
When people hear “glissando,” they often think of the piano, but other instruments, too, incorporate glissando as a playing technique, so it’s not exclusive to keyboard instruments.
Glissando is actually easier to perform on instruments like the marimba or harp than on the piano.
However, because the piano has a wide range and can use pedals, the glissando effect on the piano is more impactful than on other instruments.
Although glissando involves sliding across the keys, the sliding area can be on the white keys or the black keys. Additionally, there are various patterns, such as ascending or descending glissando, or whether you use your right hand or left hand. The technique varies depending on the piece.
White Key Glissando
*Debussy “Pour le Piano – Prelude”(First glissando at 1:00)
This piece contains a total of 5 glissandos.
I played my first glissando with this piece, and it was quite challenging until I got used to it. Each of the five glissandos spans a significant range and is written to build intensity, so I often tensed up and ended up with subcutaneous bleeding multiple times.
While practicing, my fingers would hurt every time I played, so I resorted to lightly sliding my fingers over the keys without actually playing them, pretending to perform the glissando.
Until I grasped the technique, I just had to brace myself for the pain while playing…
*Prokofiev “Piano Sonata No. 6, Movement 1”
(The first glissando appears at 4:54.)
This piece requires even more power than the Debussy. However, it didn’t hurt because I had already mastered the glissando technique.
Partly because I had already learned the technique, but also because this piece demands you to play as if possessed, completely absorbed in the music (or it compels you to be), I may not have even registered the pain.
◆How to Play White Key Glissando
In my case, I play in a way that the keys make contact with my nails. Be careful to adjust the angle properly, as improper technique can cause subcutaneous bleeding or cuts that lead to bleeding!
【Right Hand: Ascending】
When ascending with the right hand, I often use fingers 3 and 4 together.
【Right Hand: Descending】
When descending with the right hand, I usually play with fingers 2 and 3 together.
In some cases, I use finger 1 to descend. This happens when there isn’t enough time to rotate my wrist or if I need to quickly move to the next note without time to reset the angle of my wrist.
【Left Hand: Ascending】
When ascending with the left hand, I play with fingers 2 and 3 together.
For the left hand, since it often involves leaps or chords, I sometimes use just finger 1 to play without changing the wrist’s orientation.
【Left Hand: Descending】
When descending with the left hand, I use fingers 3 and 4 together.
While I don’t do this myself, there are also methods that don’t use nails, such as playing with the pads of the fingers or even using the palm of the hand.
For keyboards or other lightweight instruments with very light keys, playing with the pads of your fingers, as if stroking the keys, might produce a more beautiful glissando than using nails.
Black Key Glissando
Ravel “Jeux d’eau”(The black key glissando appears at 2:38. It is played with the pads of the fingers.)
Black key glissandos are slightly more challenging than white key glissandos. If you’re not used to them, they can be painful…
For black key glissandos, there are two methods: playing with the pads of your fingers or playing with the back of your hand.
【Back of the Hand】
When playing with the back of the hand, it tends to produce a more brilliant sound due to the added momentum, but it can be painful depending on where you make contact.
【Pads of the Fingers】
When playing with the pads of your fingers, it produces a slightly heavier, less resonant sound, but this method is less painful and easier to execute.
Unlike white key glissandos, black key glissandos don’t involve making contact with the nails but rather with the fingers or the pads of the fingers, which might result in more pain than with white keys.
Whether using the back of the hand or the pads of the fingers, I play with my fingers quite flattened, using the entire finger.
If your fingers are upright while gliding over the black keys, it will feel very bumpy and could be quite painful. Try flattening your fingers to the point where the second joints of fingers 2, 3, and 4 (or fingers 2 and 3 if using the back of the hand) touch the keys. This method should minimize pain.
The affected area might turn red or have slight peeling of the skin, but it shouldn’t lead to bleeding.
Here’s a helpful video explanation that makes it easy to understand, so I’ve included it!
Glissando with Double Notes Becomes Extremely Difficult!!!!
When it comes to double notes, the difficulty level increases significantly. Unlike single notes, double notes require both notes to sound at the same time, which presents a unique challenge.Although I have never seriously attempted a piece with double-note glissandos, trying it out revealed how difficult it is to glide smoothly and make both notes sound properly.
Double-Note Glissando (Various Intervals)
(It starts at 6:54.)This is a continuation of the previous video, and it also explains double-note glissandos.
For double-note glissandos, it’s crucial to release tension in your hands, otherwise, it becomes extremely challenging. I plan to use this as a reference and practice it myself.
【Glissando in quadruple notes】
— Tomoki Sakata 阪田 知樹 (@TomokiSakata) November 29, 2020
New Piano Technic by me😆
【四重音によるグリッサンド】
私が開発した新しいピアノテクニック😆
I.Stravinsky:Trois Mouvements de Petrouchka 1.Danse russe
I.ストラヴィンスキー:ペトルーシュカからの3楽章 第1曲ロシアの踊り
#気まぐれサカタライブラリー pic.twitter.com/EGfzuAwYQb
It’s incredible that such a thing is possible… I’m absolutely amazed!
Octave Glissando
男は黙ってグリッサンドをこう弾く pic.twitter.com/WtAeI7Ro28
— 菊池亮太🎩(Anoatari) (@komuro_metal) December 12, 2020
This technique requires large hands. It’s impossible for me to do it.
Even if you can play octaves, that doesn’t necessarily mean you can perform this. However, if you can divide the glissando between both hands, you might be able to play it, even if it’s not possible with one hand.
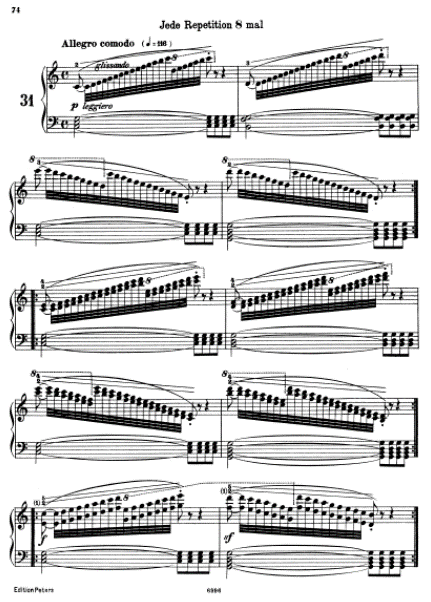
Czerny, who composed numerous etudes, also wrote one for glissando practice. Exercise No. 31 in his Op. 60 etudes includes single-note, double-note, and octave glissandos. The fingerings for playing glissandos are also specified.
What You Need to Do to Avoid Bruising or Bleeding
There are many different ways to play a glissando, and there’s no definitive right or wrong way to do it.
Whether it’s single notes, double notes, ascending, or descending, the most important thing is to relax and let your fingers glide. While there are various ways to play, the common denominator is always to release tension.
It’s also crucial to play with the mindset that the movement originates from the arm, not just by trying to move your fingers.
If you jump straight to playing on the keyboard, it might be hard to gauge the right amount of force. Instead of diving right in, you might find it helpful to start by practicing placing your nails on the keys and making a clicking sound above the keyboard.
Once you’ve mastered that, try playing on a keyboard with lighter keys than a piano, and gradually produce sound. When practicing on a piano, using the pedal can help you avoid trying too hard to make a sound, allowing you to play with less tension.
YouTube has many instructional and performance videos explaining tips for glissandos. Refer to those to learn a pain-free way of playing and grasp the technique.
When it comes to music, explaining solely through words can be very challenging. Watching videos is likely to be more educational.
While watching videos, observe carefully. Don’t just focus on the hands and piano keys—pay attention to how the arms and shoulders are being used, as there might be hints for playing better.
If you’re following the instructions yet still struggling, it’s a good idea to film yourself from the side while playing with your smartphone. By viewing your playing objectively, you’ll likely notice differences compared to skilled players.
This advice isn’t limited to glissandos. While you can learn a lot by being directly taught by others, maintaining an objective perspective can enable you to improve and correct mistakes on your own to a certain extent.
If you’ve never recorded or filmed yourself playing, definitely give it a try!
Summary
◆ There are no strict rules for how to play a glissando◆ Glissandos can include not just single notes but also double notes and octaves
◆ Always keep the mindset of relaxing and letting your fingers glide across the keys

